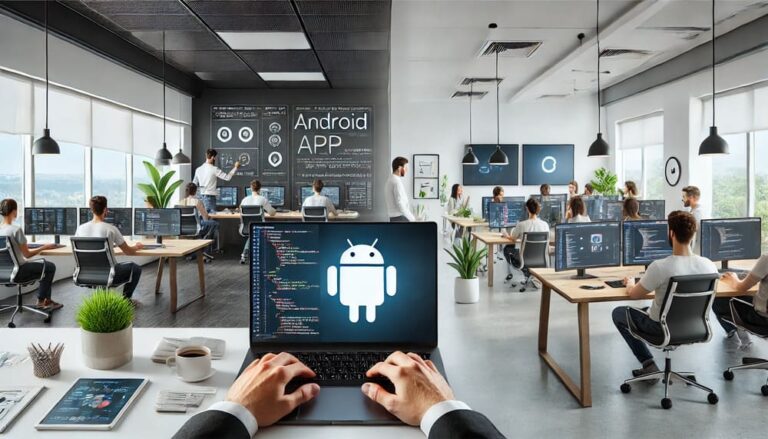
Membangun aplikasi Android yang sukses butuh perencanaan matang, sumber daya yang tepat, dan pemahaman mendalam tentang ekosistem aplikasi mobile. Dengan jutaan aplikasi yang ada di Google Play Store, bikin aplikasi yang bisa menonjol dan memenuhi kebutuhan pengguna bukan hal gampang. Tapi dengan strategi yang pas, kamu bisa bikin aplikasi yang nggak cuma berfungsi dengan baik, tapi juga menarik dan bikin pengguna betah.
Di panduan ini, kita bakal bahas langkah-langkah bikin aplikasi Android yang sukses, mulai dari ide awal sampai meluncurkannya di Google Play Store. Dengan mengikuti langkah-langkah ini, kamu bisa lebih siap menghadapi perjalanan pengembangan aplikasi dan mewujudkan konsep kamu jadi nyata.
- Langkah 1: Konsep Aplikasi
- Langkah 2: Buat Wireframe dan Alur Pengguna
- Langkah 3: Rencanakan Kebutuhan Teknis Aplikasi
- Langkah 4: Mulai Pengembangan Aplikasi
- Langkah 5: Uji Coba dan Debugging
- Langkah 6: Siapkan Peluncuran di Google Play Store
- Langkah 7: Maintenance dan Update Setelah Peluncuran
- Gimana Noethera Studio Bisa Bantu?
Langkah 1: Konsep Aplikasi
Semua aplikasi yang sukses dimulai dari ide yang keren. Sebelum masuk ke tahap pengembangan, luangkan waktu buat brainstorming dan validasi ide aplikasi kamu. Pikirin masalah apa yang bisa diselesaikan aplikasi kamu, siapa target audiensnya, dan gimana aplikasi kamu bisa beda dari yang lain.
Riset itu penting banget di tahap ini. Cek aplikasi-aplikasi yang udah ada di pasar dan mirip sama ide kamu. Analisis kelebihan dan kekurangannya, terus lihat apa yang bisa kamu tingkatkan. Setelah punya gambaran jelas tentang pasar dan kebutuhan pengguna, kamu bisa mulai nentuin fitur dan fungsi inti dari aplikasi kamu.
Jangan lupa juga buat mempertimbangkan platform-nya. Karena fokus kamu di Android, pastiin ide aplikasi kamu cocok sama preferensi dan perilaku pengguna Android. Android itu fleksibel banget dan punya basis pengguna yang besar, bikin dia pilihan populer buat banyak bisnis.
Langkah 2: Buat Wireframe dan Alur Pengguna
Setelah ide solid, langkah berikutnya adalah bikin wireframe. Wireframe ini semacam blueprint atau sketsa kasar dari tata letak aplikasi kamu. Ini membantu buat visualisasi struktur dan navigasi aplikasi sebelum masuk ke tahap pengembangan.
Bayangin wireframe itu kayak kerangka aplikasi. Ini nunjukin gimana layar-layar berbeda saling terhubung, gimana pengguna bakal bergerak melalui aplikasi, dan di mana elemen-elemen seperti tombol, formulir, dan gambar akan ditempatkan.
Di tahap ini, pikirin juga soal desain pengalaman pengguna (UX). Pastikan perjalanan pengguna simpel dan intuitif. Tujuannya adalah bikin pengguna semudah mungkin buat menyelesaikan tugasnya. Buat navigasi yang straightforward dan pastiin antarmukanya bersih dan menarik secara visual.
Langkah 3: Rencanakan Kebutuhan Teknis Aplikasi
Sebelum mulai pengembangan, kamu harus nentuin stack teknis yang bakal mendukung aplikasi kamu. Buat aplikasi Android, Java dan Kotlin adalah bahasa pemrograman yang paling populer, sementara Android Studio adalah environment pengembangan yang paling banyak digunakan.
Selain bahasa pemrograman dan tools, kamu juga perlu mikirin infrastruktur back-end, database, dan integrasi pihak ketiga. Misalnya, kalau aplikasi kamu butuh autentikasi pengguna, push notification, atau pembayaran dalam aplikasi, kamu perlu menyiapkan server dan API yang diperlukan.
Keamanan juga harus jadi prioritas. Pastikan aplikasi kamu aman dari awal bakal melindungi data pengguna dan bikin mereka percaya sama aplikasi kamu. Ikuti praktik terbaik buat keamanan aplikasi, seperti enkripsi informasi sensitif dan penggunaan protokol aman buat transmisi data.
Langkah 4: Mulai Pengembangan Aplikasi
Setelah perencanaan selesai, saatnya mulai proses pengembangan. Pengembangan aplikasi Android biasanya melibatkan dua fase utama: pengembangan front-end dan back-end.
Pengembangan front-end fokus pada apa yang dilihat dan diinteraksi oleh pengguna. Ini termasuk membangun antarmuka pengguna (UI) dan menerapkan elemen desain yang udah didefinisikan di tahap wireframe. Di fase ini, developer bakal memastikan aplikasi tampil keren di berbagai ukuran layar dan resolusi.
Sementara itu, pengembangan back-end melibatkan kerja di balik layar yang membuat aplikasi berjalan. Ini termasuk menyiapkan database, server, dan API yang memungkinkan aplikasi berfungsi. Back-end ini penting banget buat aplikasi yang butuh penyimpanan data, akun pengguna, atau komunikasi real-time.
Biar pengembangannya tetap on track, kamu bisa pakai tools manajemen proyek dan metode seperti Agile. Pendekatan ini memecah proyek jadi tugas-tugas kecil dan memungkinkan fleksibilitas kalau ada perubahan yang perlu dilakukan di tengah jalan.
Langkah 5: Uji Coba dan Debugging
Setelah aplikasi dikembangkan, saatnya buat uji coba menyeluruh. Uji coba ini adalah salah satu langkah paling krusial dalam proses pengembangan aplikasi karena memastikan aplikasi kamu berfungsi sesuai harapan dan memberikan pengalaman pengguna yang mulus.
Mulai dengan uji coba fungsional buat ngecek apakah semua fitur berfungsi dengan benar. Pastikan tombol, formulir, dan elemen interaktif lainnya berperilaku sesuai harapan. Setelah itu, lanjut ke uji coba usability. Ini melibatkan pengguna nyata yang mencoba aplikasi kamu buat ngidentifikasi titik-titik masalah atau area yang bisa diperbaiki dalam pengalaman pengguna.
Selanjutnya, lakukan uji coba performa buat memastikan aplikasi kamu berjalan lancar, bahkan saat dipakai secara intensif. Cek juga apakah ada crash, waktu loading yang lambat, atau bug yang bisa bikin pengalaman pengguna jadi jelek.
Terakhir, lakukan uji coba keamanan buat memastikan aplikasi kamu aman. Cari tahu kerentanan dan cek seberapa baik aplikasi menangani enkripsi data, autentikasi, dan langkah-langkah keamanan lainnya.
Langkah 6: Siapkan Peluncuran di Google Play Store
Setelah aplikasi kamu siap, langkah selanjutnya adalah meluncurkannya di Google Play Store. Sebelum meluncurkan, kamu perlu bikin akun developer di Google Play. Akun ini bakal memungkinkan kamu buat mengelola aplikasi, melacak unduhan, dan merespons ulasan pengguna.
Saat submit aplikasi ke Google Play Store, kamu perlu nyediain deskripsi lengkap tentang aplikasi kamu, termasuk fitur-fitur utama, manfaat, dan gimana aplikasi ini bisa menyelesaikan masalah pengguna. Pastikan deskripsi aplikasi kamu dioptimalkan buat SEO dengan menggunakan kata kunci yang relevan yang mungkin dicari oleh pengguna potensial.
Kamu juga perlu menyediakan screenshot aplikasi dan video promosi, kalau ada. Visual ini kasih gambaran ke pengguna tentang apa yang bisa mereka harapkan dan berperan besar dalam meyakinkan mereka buat mendownload aplikasi kamu.
Terakhir, pastikan kamu memilih kategori dan tag yang tepat buat aplikasi kamu, karena ini bakal bantu aplikasi kamu lebih mudah ditemukan oleh audiens yang tepat.
Langkah 7: Maintenance dan Update Setelah Peluncuran
Pekerjaan kamu nggak berhenti setelah aplikasi diluncurkan. Update dan maintenance rutin itu penting buat menjaga aplikasi kamu tetap berjalan lancar dan tetap relevan buat pengguna. Setelah peluncuran, pantau performa aplikasi kamu dengan alat analitik buat dapetin insight tentang perilaku pengguna, crash aplikasi, dan metrik penting lainnya.
Dengerin feedback pengguna dan lakukan perbaikan buat ngatasi masalah atau nambah fitur baru yang diminta pengguna. Update aplikasi secara berkala nggak cuma bikin pengguna tetap engaged, tapi juga ningkatin visibilitasnya di Google Play Store, karena aplikasi yang sering di-update cenderung punya peringkat lebih tinggi.
Gimana Noethera Studio Bisa Bantu?
Membangun aplikasi Android yang sukses butuh keahlian dan perhatian terhadap detail. Di Noethera Studio, kami ahli dalam mengembangkan aplikasi Android custom yang disesuaikan dengan kebutuhan bisnis kamu. Tim developer berpengalaman kami bakal bantu kamu di setiap langkah, mulai dari konsep awal sampai dukungan setelah peluncuran.
Apakah kamu pengen bikin aplikasi buat bisnis kecil atau solusi yang lebih kompleks, Noethera Studio bisa kasih keahlian dan tools yang kamu butuhkan buat sukses. Hubungi kami sekarang buat diskusi lebih lanjut tentang gimana kami bisa bantu kamu mewujudkan ide aplikasi Android kamu.